31 May 2013

Apple and Quinoa Flan


I love when a recipe is exactly what you wait!
And this happens with this quinoa dessert  I made from Peru Delights a lovely blog with peruvian recipes.
Chile and Peru have a lot of similar things in some foods and we love especially peruvian desserts, like Suspiro Limeño and others.
The mix mix of quinoa, apple and condensed milk make a delicious flan!
Im sharing with Blogs chilenos and you  can see other great recipes in the link HERE


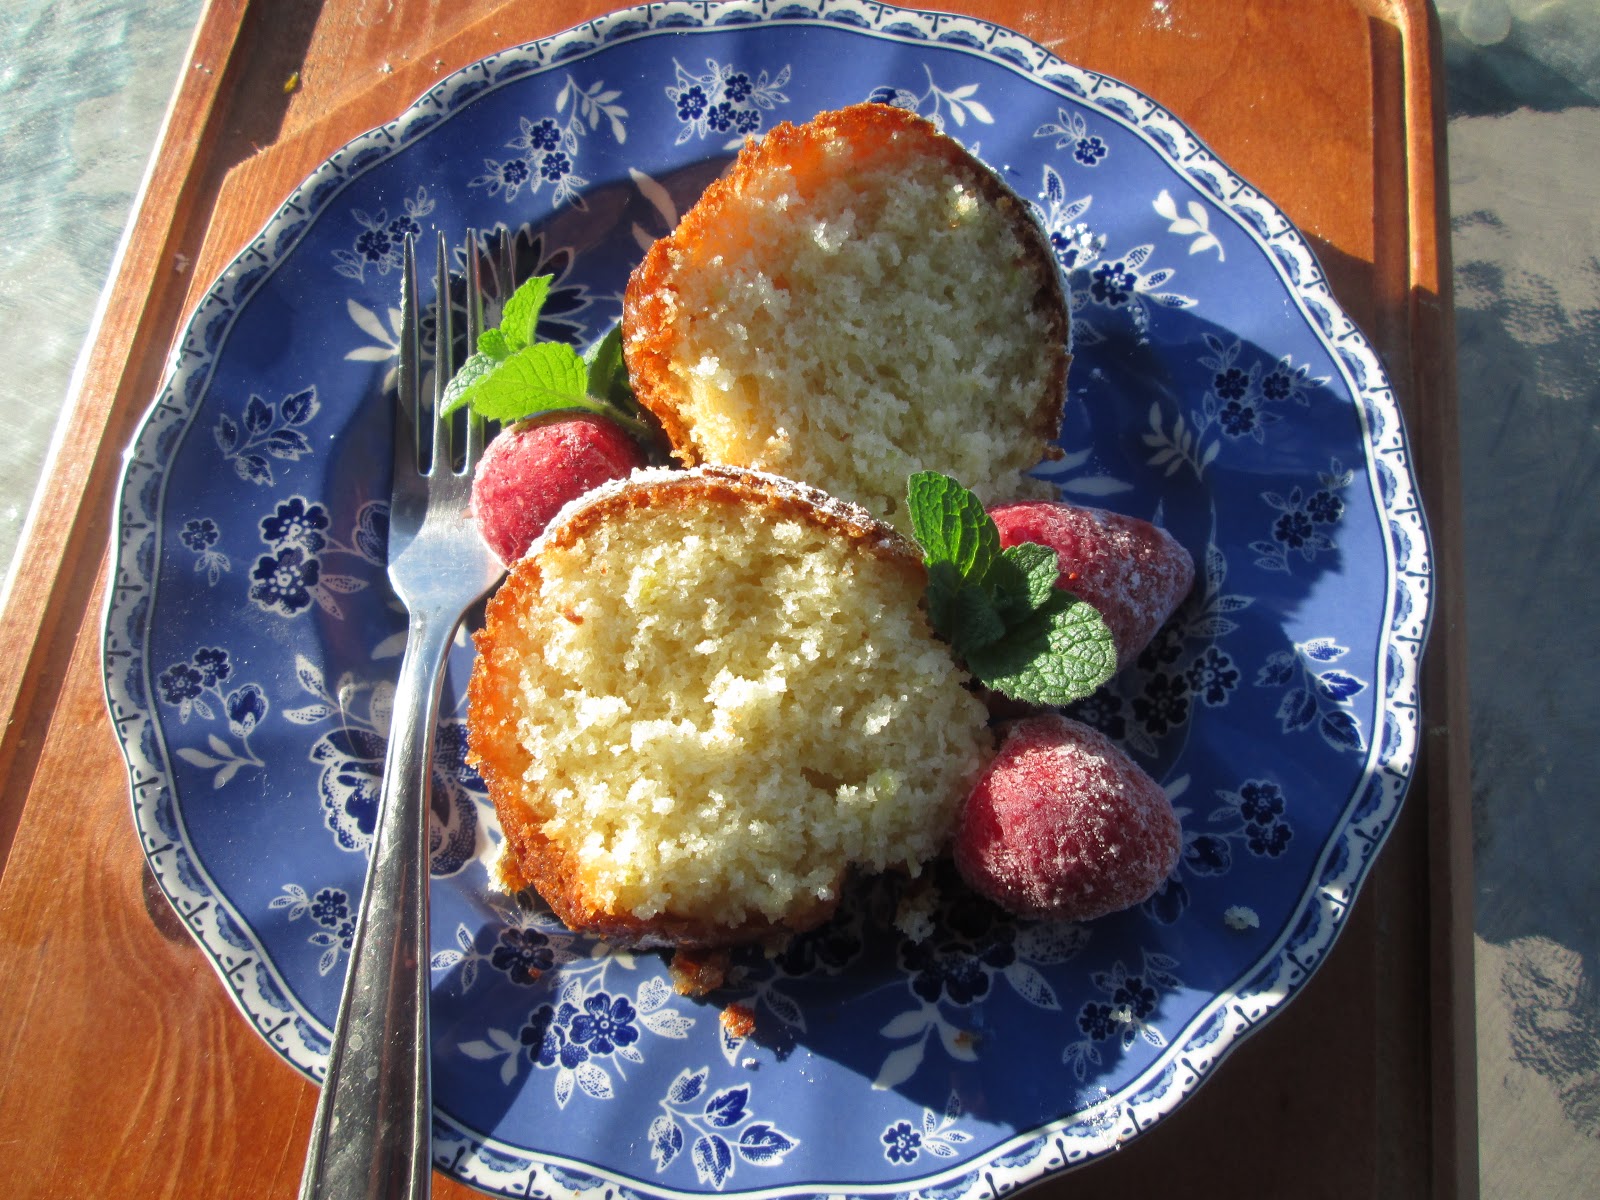
Apple and quinoa flan

Ingredients
1/3 cup white quinoa
1 granny Smith apple or other apple peeled and chopped
1 cinnamon stick
 1 1/2 cups water
1 cup of sugar
1 can sweetened condensed milk
1 can unsweetened evaporated milk
1/2 can of the cooking liquid of the quinoa
4 eggs
1 teaspoon vanilla essence

    Method
    Cook quinoa with apple,cinnamon stick and 1 1/2 cup water, over medium heat for 15 minutes or until soft. Reserve and let cool. Strain, reserving the cooking liquid, and measure 1 cup of quinoa with apple.
    Preheat oven to 180°c.
    For caramel, in a saucepan put sugar with tablespoons water, and cook over high heat until lightly golden.Do not let it take too much color because it turns bitter.
    Pour a small amount of caramel in six ramekins.Be careful with caramel is extremely hot and may burns in the skin.
    Now, In the blender process quinoa mix(with the chopped apple), eggs, sweetened condensed milk, unsweetened evaporated milk, vanilla and 1/2 can of the cooking liquid you cooked the quinoa.
    When is ready, pour in the ramekins and accommodate all in a large baking pan, with at least two inches rim, because we are adding one inch hot water, so the flans can bake in a water bath.
    Bake for 40 minutes. Turn off the oven, take out the flans and let them cool at room temperature. Then put them in the fridge and let them rest overnight.
    Unmold, garnish with some berries and mint leaves and a drop of whiped cream is perfect too. 
    Note:
    Some of you asked  if tasted to apples, really not,  really taste like  Dulce de Leche maybe by the condensed milk and when you cook it you have dulce de leche, anyway is absolutely delicious.


      Im sharing with

    Mixitup


    StoneGable


      Está adaptado de una receta de Peru Delights un blog peruano con deliciosas recetas.   Con Peru tenemos en comun muchas recetas y repostería , desde el tiempo de la Colonia , la lúcuma, la chirimoya, el manjar o dulce de leche en fin montones de recetas deliciosas.
      Este es mi aporte a Blog de recetas chilenos donde tambien pueden encontrar otras ricas recetas.

      Ingredientes (6 porciones)

      1/3 taza de quinoa blanca (la más comun)
      1 manzana verde pelada y cortada en trozos
      (u otra manzana)
      1 palito de canela
      1 1/2 taza de agua
      1 taza de azúcar
      1 tarro de leche condensada
      1 tarro de leche evaporada
      1/2 tarro de agua de cocción de la quinoa
      4 huevos
      1 cucharadita extracto de vainilla

      Preparación

      En una olla mediana cocinar la quinoa con la manzana picada y 1 taza y 1/2 de agua ( si se ve seco agregar un poco más porque siempre se evapora) cocinar a fuego medioalrededor de 15 minutos o hasta que la quinoa se vea cocida.
      Dejar enfriar. Luego colar y guardar el liquido de la cocción. Medir una taza de la mezcla de quinoa con manzana.
      Precalentar el horno a 180° .

      Aparte preparar caramelo en una olla poner 1 taza de azucar y unas 2 o 3 cucharadas de agua.
      Cocinar hasta que esté ligeramente dorado, no calentar demasiado porque se pone amargo.
      Repartor este caramelo con cuidado en 6 potes de cerámica resistentes al calor. Con cuidado porque el caramelo quema mucho si cae en la piel.

      En la licuadora colocar la mezcla de quinoa, los huevos, la leche condensada, la leche evaporada, vainilla y 1/2 tarro del jugo de cocción de la quinoa.
      Cuando esté lista la mezcla repartir en 6 moldes de cerámica o pyrex (resistentes al calor) y colocar en uns asadera extendida y poner un poco de agua sin mojar los flanes, para cocinar a baño maría.
      Cocinar durante unos 40 minutos hasta que esten firmes, retirar la asadera y dejar enfriar primero a temperatura ambiente y despues en el refrigerador por lo menos toda la noche.
      Al otro día desmoldar con cuidado pasando por el borde la punta de un cuchillo adornar con unas berries y hojas de menta. Tambien se le puede agregar un poco de crema al servir.

    28 May 2013

    Cappuccino cakes


    This is something fun and easy to make when you have some friends a Capuccino cake (I think is my third dessert in cups! maybe is funny)

    This dessert coming from Taste.com (australia)


    Ingredients
    (6  desserts cups)

    180 butter room temperature
    3/4 cup brown sugar
    2 eggs
    300 g. self raising flour
    3/4 cup freshly brewed espresso coffe
    cooled
    1/2 cup buttermilk or plain yogurt
    250 creme cheese (like Philadelphia)
    1/2 cup thickened cream
    1/4 cup icing sugar
    2 tablespoon of Kahlua liqueur or oher like coñac or amaretto
    cocoa podwer to dust


    Method

    Preheat oven to 180° and brush 6 ovenproof tea cups
    with melted butter to lightly grease.
    use and electric beater to beat together the butter and sugar in a medium bowl until pale and creamy. Add the eggs 1 at a time, beating well after each addition.Use a large metal spoon to fold in the flour, coffe and yogurt until well combined. Spoon the mixture avenly among the prepared cups or pans , Baken in oven in a large meatl pan with a little water like bain marie (I prefer this though you never now if the cups are ok)  for 25 to 30 minutes or until a skewer inserted into the centres comes out clean.
    Set aside by 1 hour to cool completely.
    In a large bowl whisk the cream cheese and icing sugar until the mixture thickens slightly, add the Kahlua or other liqueur until combined.
    Spoon the cream cheese mixture  over each cake and spread  to the edge. Sprinkle with cocoa powder to serve.


    Im sharing with


    StoneGable
     
     
    FlourMeWithLove Button
     
    print recipe


    EN ESPAÑOL

    Cakes  Cappuccino


    24 May 2013

    Microwave raspberry jam


    Sometimes I make some microwave recipes and  I posted them  but never  have made jam in microwave. Many people do not like the microwave, but I think everything can be used in proper place, is what I think sometimes when I had to cook several meals microwave help so much.

    This jam was great and for that posted,  I do not have much faith :) but it was great  and  can use raspberries, blueberry or strawberries. (I made jams always but with the old method)

    The microwave is much to respect the times (I was on  a course in microwave for a while) and many of you will  be in berries season soon, anyway you can use too frozen berries.

     
    Ingredients
     
    450 g of raspberries
    or strawberries
    1 tablespoon of lemon juice
    450g of sugar
     
     
     Method
     
     
    In a microwave safe bowl (capacity of about 3 liters), put the raspberries (the container must be large since the mixture can rise while cooking)
    Sprinkle with lemon juice raspberries.
    Cook in microwave for 5 minutes.

    Remove from the microwave, add sugar and stir well so that the sugar remains dissolved.
    Cook in the microwave for 15 minutes on high power.
    Remove and stir.
    Back to put  other 15 minutes on high power again.
    Remove and stir and then again 15 minutes.
    Total: 45 minutes
    Remove, stir and see the consistency. Wait a bit, if you want more thicker about 10 minutes.But remember when the jam is cool will be more thick.
    Remove and let cool slightly.
    Place  in clean jars and allow to dry without the lid, I put a kitchen tablecloth and the next day I close them.
    Enjoy!


    PRINT RECIPE


    Im sharing with


    Made with Love Mondays, hosted by Javelin Warrior

     
    StoneGable


    EN ESPAÑOL
    Mermelada de frambuesas en microondas


    No son muchas cosas las que hago en microondas pero como todo en la vida el equilibrio es importante (hay gente que no quiere nada con el microondas)
    Yo hago algunas cosas y quedan estupendas, sobre todo me ayuda cuando tengo que cocinar varias cosas al mismo tiempo.
    Cunado vi esta receta de la mermelada me dio la curiosidad sobre todo que normalmente hago mermeladas con el método tradicional.
    Es estupendo cuando se quiere hacer cantidades pequeñas (salieron 3 frascos) , es bastante rápido, mientras se iba haciendo yo hice otras cosas.
    Hace unos años hice un curso de microondas muy bueno y aprendí mucho, una de las cosas que el microondas es mucho de respetar los tiempos.

    Ingredientes

     450 gramos de frambuesas (se pueden ocupar congeladas)
    pueden ser frutillas tambien
    450 gramos de azúcar
    1 cucharada de jugo de limón
    3 frascos medianos (limpios y secos)

    Preparación

    En un bol grande apto para microondas (de unos 3 litros de capacidad) colocar las frambuesas con el jugo de limon (si son congeladas descongelar antes unos minutos) revolver y poner al microondas por 5 minutos.

    Retirar  revolver y agregar el azúcar, revolver bien.
    Cocinar primero por 15 minutos en potencia alta.
    Retirar y revolver.
    Colocar de nuevo por 15 minutos en potencia alta.
    Retirar y revolver.
    Nuevamente colocar por 15 minutos más y despues dejar reposar un poco.
    La textura cuando se enfría queda espesa, si encuentran que le falta colicarla  unos 10 minutos más.
    Recordar que cuando se enfria se va espesando por eso ver como está primero.
    Dejar enfria un poco y colocar en frascos dejar todo un dia tapados con un paño de cocina y al otro día poner las tapas.
     

    22 May 2013

    Fish with capers sauce and cherry tomatoes


    I love capers and sometimes I  make with chicken or fish, and the amazing the kids love this too!
    This fish alone sometimes  is nothing special but with this sauce taste amazing!
    For this plate you can use tilapia or other white fish


    Ingredients 

    4  (about 600g) firm white fish fillets
    (like tilapia or cod)
    80 g butter in cubes
     1 tablespoon of sunflower oil
    2 tablespoon of capers
    4 tablespoon of lemon juice
    salt and pepper
    2 cups of cherry tomatos roasted in olive oil

     Method


    In a large skillet melt the butter with the tablespoon of oil (so it does not burn the butter) over medium heat, add the fish and fry for about 2-3 minutes per side or until browned.
    Be careful not overcooking. Remove the fish to a serving platter.
    Return to  the pan to medium heat   and cook until the butter is golden brown. Add the capers and lemon juice. Boil for one minute and pour over the fish,
    Apart roast the tomatoes in olive oil and serve with the fish.
    You can serve too with mashed potatoes .


    EN ESPAÑOL

    Pescado con salsa de alcaparras
    y tomatitos cherry


    Esta salsa de alcaparras me encantó porque a veces para los niños es medio fome el pescado a la plancha o al sartén pero con las alcaparras los encontraron maravilloso.
    Ya lo había hecho antes con pollo.
    Las alcaparras que usé son Gourmet y son muy buenas.
    (Pueden haber otras marcas pero esta me gusta) (me podría auspiciar Gourmet ja!)
    La verdad es que siempre les digo donde compro los ingredientes que a veces son más especiales, yo sé como es, vivo en Calera de Tango, y no tengo ningun supermercado cerca, sólo San Bernardo que es bastante bueno pero hay cosas que a veces no encuentras.
    Las alcaparras las encuentran en todos los supermercados grandes.

    Ingredientes
    4 filetes de merluza o reineta (unos 600 g)
    80 gramos de mantequilla
    1 cucharada de aceite
    2 cucharadas de alcaparras
    4 cucharadas de jugo de limón
    sal y pimienta
    2 tazas de tomates cherry salteados
     en aceite de oliva

    Preparación
    En un sartén grande calentar la mantequilla con el aceite a fuego medio no muy fuerte. (la cucharada de aceite es para que no se queme la mantequilla)

     Agregar el pescado y cocinar dos o tres minutos por lado o hasta dorar. Cuidar de no sobrecocer el pescado.
    Retirar con cuidado el pescado a una fuente o plato grande
    Volver el sartén al fuego y cocinar hasta que la mantequilla esté ligeramente dorada. Agregar las alcaparras y jugo de limón .Dejar que hierva un minuto y verter sobre el pescado.
    Servir de inmediato con los tomatos dorados en un poco de aceite de oliva.
    Tambien se puede servir con puré.

    20 May 2013

    Lemon and Honey Cake


    Is  time of Secret recipe Club  again, this month my assignment  was Nayna from Simply.food and really enjoyed her blog looking for recipes, finaly I choose this Lemon and Honey Cake and was a really delicious recipe, so moist and yumm!


    Secret Recipe Club


    Ingredients
     
     
    For Cake:
    180 ml Sunflower oil
    2 eggs
     
    1 tablespoon lemon zest
    2 tablespoons lemon juice
    280 grams Greek  Yoghurt
    350 grams caster sugar
    300 grams self raising flour


    For Syrup:
    2 tablespoons lemon Juice
    2 tablespoons honey
    3 tablespoons icing sugar for syrup
    1/2 tablespoon icing sugar for dusting cake 


    Method
     Preheat oven to 180 Degrees C / 350 F
     Grease a Brundt cake tin and keep it aside
    In a large bowl add the eggs,oil and sugar and whisk, add the yoghurt, lemon rind and whisk again.
     Sieve the flour in another bowl and add it to the wet mixture. Fold the flour gently to the wet mixture.
    Pour the mixture into the prepared greased cake tin and smooth it on the top.
     Place it in the preheated oven to bake for 40-45 minutes, or check with a skewer, a clean skewer means cake is baked.
    Remove cake from oven and leave to cool in tin.Once cooled invert the cake tin onto serving plate.
    Place the lemon juice, honey and icing sugar in a saucepan, heat gently until sugar melts.

     Poke holes in the cake with the skewer and pour over it the warm lemon syrup.
     Before cutting the cake dust it with some icing sugar.
    Serve the cake with some a spoonful of greek yogurt and some strawberries.

    Print recipe here 
     
    See others nice recipes of Secret Recipe Club here


    En Español
    Cake de limón y miel


    17 May 2013

    Bluberry crumble tarts


     These little tarts are special for tea time or with a coffe or a juice:) I think with a little  scoop of Ice cream would be delicious but I didn't have at home!


     Ingredients
    filling

    300 g of blueberries
    2 teaspoons of cornstarch
    55 g of sugar
    4  teaspoon of water

    cover

    60 g of all purpose flour
    lemon grated (the peel)
    40 g butter in cubes
    30 g. sugar

    dough
    (to 12 tarts)
    350 g. all purpose flour
    85 g glass sugar
    170 g butter room temperature
    4 yolks

    Place the flour on the counter and add sugar.
    Mix well add butter and egg yolks. Work the butter and the egg yolks with the fingertips.
    Mix well until it has incorporated everything and make a smooth ball.
    Put dough into the bag and refrigerate for 15 minutes.
    Remove and spread with the roller and  sprinkle a little flour before and cut dough of the size of the pans to be filled.Set aside.


    Filling


    Put half of the blueberries in a saucepan with the cornstarch, sugar and water. Cook over medium heat, stirring constantly for 2 to 3 minutes or until that start to release juice and sauce is thickened. Remove from heat and add the remaining blueberries ..
    For topping, mix flour with grated lemon zest, butter and sugar. Rub with your fingers to make crumbs like bread.
    Divide the filling into the molds with the tarts and top with the crumble.
    Put to oven for about 15to 20 minutes
    and bake until crust is deep golden .
    Cool in the tin - these are best served just warm. Carefully lift the pies out of the tin , transfer to a platter and serve.


    Print Recipe here

    En español
    Tartas de arándanos con crumble


    Estas tartitas son maravillosas y se pueden hacer con cualquier berry congelado que es más facil de encontrar en este tiempo.
    En el jumbo aún tienen arándanos pero carísimos, vean ustedes yo creo que para estas cosas convienen más los congelados son más baratos a veces.
    Yo las hice con arándanos pero podrian ser con frutillas o frambuesas o moras.


     Ingredientes 
    masa (12 tartaletas)
    (se pueden usar los moldes para muffins)

    relleno y cubierta
    300 gramos de arándanos
    (frescos o congelados)
    2 cucharaditas de maicena
    4 cucharaditas de agua
    55 gramos de azúcar

    la ralladura de 1 limón
    40 gramos de mantequilla
    60 gramos de harina
     30 gramos de azúcar

    Masa
    350 gramos de harina sin polvos de hornear
    85 gramos de azúcar
    175 gramos de mantequilla
    a temperatura ambiente
    4 yemas

    Preparación

    Colocar la harina sobre la mesa o una tabla de cocina, mezclar con la harina, y agregar la mantequilla y las yemas, unir de a poco con los dedos para ir haciendo una masa que se pueda formar una bola, si es necesario agregar un poco de harina, formar una bola y envolver en plástico y refrigerar durante unos 15 minutos.

    Al retirar del refrigerador colocar un poco de harina en la mesa antes de usar el rodillo, estirar la masa (no muy delgada ) lo suficiente para recortar redondelas para poner en los moldes de muffins. Reservar.

    Preparar el relleno
    En una ollita poner la mitad de los arándanos con la maicena y agua, y azúcar. Cocinar a fuego medio hasta que espese.
    Revolver durante unos dos o tres minutos hasta que tenga una consistencia espesa. Retirar del fuego y agregar el resto de los arándanos-
    Rellenar las masas preparadas con esta mezcla.

    Crumble
    En un bol colocar la harina con la ralladura de limón la mantequilla y azucar.

    Luego de rellenar las masas cubrir con el crumble, Llevar a horno precalentado a 180° c. por unos 15 minutos o hasta que esten dorados.
    Retirar y dejar enfriar antes de desmoldar.


    14 May 2013

    Vegetables and ricotta little tarts


    asparagus and parmesan


    with ham and cheese


    I made these little tarts today, the original recipe is with vegetables and ricotta, delicious to me and daugther who is vegetarian but my son isn't   so I made someones with ham and ricotta:) (always happen me are twins but eat really different:)
    Anyway the crust of these tart is amazing! you can make more crust and freeze.
     You can top with zucchini slices, asparagus, eggplants, or mushrooms.
    Adapted from a recipe of Ladies'home Journal

    Ingredients 
     (8 servings)
    Crust
    2 1/2 cups all purpose flour
    1 teaspoon salt
    1 cup (2 sticks) very cold unsalted butter
    1 egg yolk

    In a food processor (or by hand) combine flour and salt.
    Add butter and pulse until butter is the size of peas. Whisk together the yolk and 1/2 cup of cold water.
    If you use the processor drizzle the liquid while pulsing to combine.
    Turn dough onto a sheet of plastic wrap and form into a ball.
    Place in fridge about 30 minutes.
    On a floured surface roll dough and cut to the shape of  little pans.
    Preheat oven at 180°c.
    Line the little pan with aluminum foil, pressing foil  and fill with dry beans and place on a baking sheet.
    Bake until crust is set and just starting to brown evenly, about 20 minutes.
    Remove beans and foil and bake for 5 minutes more.
    Let chill completely before filling.
     
    Filling
     
    Spring vegetables
    (like asparagus, zucchini, mushrooms or sliced onions)
    or prosciuto or ham in slices.
     3/4 cup of ricotta
    3/4 cup grated parmesan
    1/2 cup heavy cream
    2 eggs
    salt an pepper
    1 clove garlic finely minced (optative)
     
    In a mixing bowl whisk together the ricotta, parmesan, cream, garlic salt and pepper  until smooth.
    Divide the cream between baked tarts shells.
    Top tarts with vegetables like asparagus or zucchinis or ham and bake about 20 to 25 minutes.
    Cool slightly then remove  tarts from the pans and serve with parmesan cheese .


    EN ESPAÑOL

    Tartaletas con vegetales y ricotta


    Hice estas pequeñas tartas hoy y recomiendo absolutamente la masa, es sencillamente deliciosa, tambien se puede preparar el doble de cantidad y congelar. Es estupenda para pequeñas tartaletas como estas, yo usé unos moldes tipo muffins pero se pueden hacer en un molde grand etambien.
    Las rellené con la crema de ricotta y espárragos pero tambien se pueden rellenar con jamón o champiñones etc.
     
    Ingredientes
    (8 tartitas)


    Masa
    2 |/2 tazas  de harina sin polvos
    1 cucharadita de sal
    1 taza de mantequilla muy fría(ojalá sin sal)
    agua fría
     
    Preparación
     
     Para la masa que se puede hacer en un procesador o a mano en un bol (generalmente la hago a mano)
    En un bol mezclar harina y la sal,agregar la mantequilla y con las manos unir deshaciendo que quede como migas de pan.
    Agregar la yema y 1/2 taza de agua fría uniendo bien hasta hacer una masa y formar una bola.
    Envolver en film plástico y dejar en el refrigerador 30 minutos.
    Despues retirar del refrigerador y estirar sobre una mesa enharinada. Cortar de la forma de los moldes que se van a usar.


    11 May 2013

    Cherry Liqueur chocolates (To my Mom) and happy Mothers day!


    Always I try make to my mom some recipe she really loves, and I remember she loves so much liqueur chocolates especially cherries!
    And yesterday at night thinking what I could make I find this lovely recipe, is simple and delicious only need some patience because you have to coated the cherries twice, anywa I tasted one and is delicious.
    For this recipe I used Marraschino but you can use others cherries too.
    I adapted this recipe from Flavoursome Delights
    Happy Mothers day tomorrow!


    Combining cherries,  liqueur and chocolate, these Cherry Liqueur Chocolates make a perfect end to any meal or can be enjoyed on their own as a special treat.

    The inspiration for these chocolates was actually a chocolate shop in the Blue Mountains, New South Wales and this is the recipe.


    Ingredients

    15 to 20  Cherries with stalks still on
    (fresh or in jar I used Great Value Maraschino cherries)
    250 g. dark chocolate
     Brandy o cognac


    Method

    Use a Cherry Pitter to remove the stones from the cherries. (If are Value cherries they dont have stones)
    Make sure you punch through the side of the cherry so as to leave the stalk intact..


    Place the cherries into a ramekin or other container and pour in enough of the Brandy so as to cover them. After doing this, put them aside and leave the Cherries to soak for at least 4 hours.
    Temper and melt the chocolate.
    (temper to bain marie)
    Remove the cherries and dry them off using paper towel. The cherries must be dry as if there is any liquid on them will ruin the melted chocolate when they are dipped.


    Dip the cherries into the chocolate. This is actually a two part process. The first dip is just to coat the base of the cherry. Once dipped, lay the cherry on its side and allow the chocolate to set.

    With the bottoms dipped next coat the cherries in chocolate
    and again lay them aside to set.

    Coat the cherry with chocolate

    Why the double dip? Well if you don’t do this, when you set the lay the cherries down to allow the chocolate to set, the weight of the cherry will push through the liquid chocolate creating a hole. This will then let the cherry juice escape greatly reducing their lifespan and making a big mess as well.

    The double dip allows you to create a strong even coating


    Once the chocolate has set completely they are ready to serve. They go together very well with Coffee after a meal or are delicious on their own as a special treat

    Enjoy:)


    EN ESPAÑOL


    Chocolates con licor para mi mamá